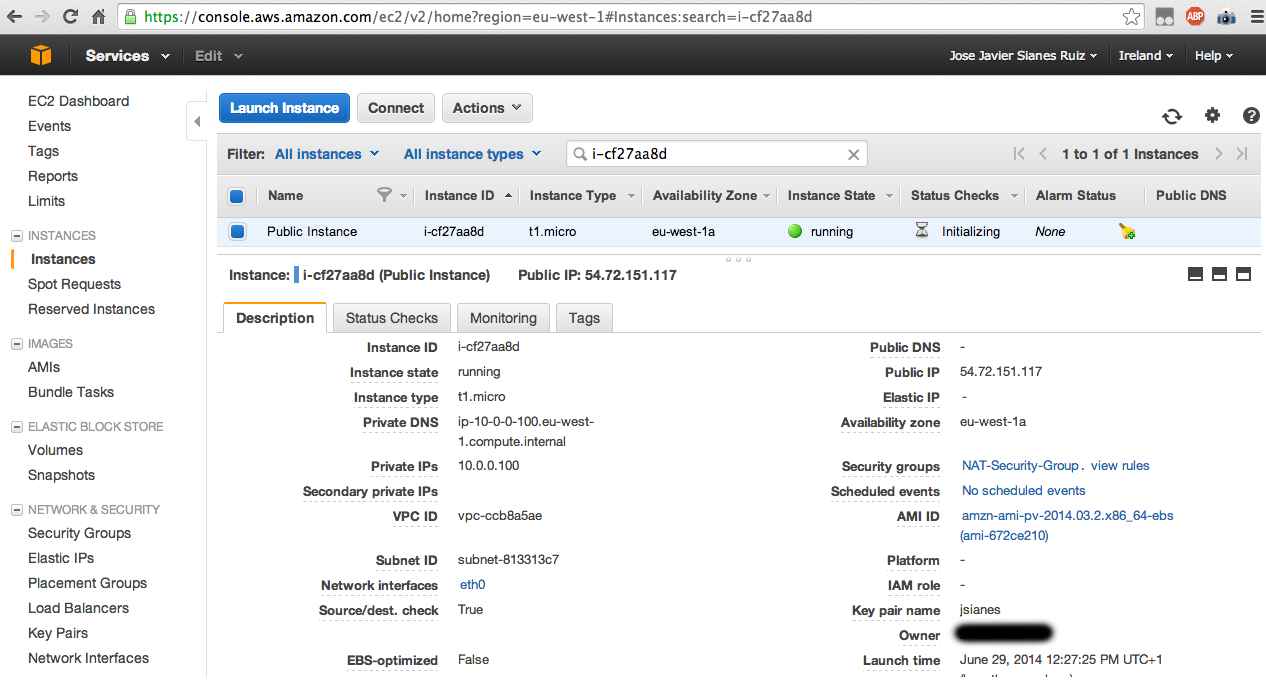
i-cf27aa8d instance has 54.72.151.117 Public IP address assigned. This IP is taken from general AWS pool. If you stop and start the instance from AWS EC2 console, a different Public IP address will be selected.
Now, imagine instance launch is controlled by an auto-scaling policy. Following explained behavior, a new random Public IP address will be attached each time a new (or replacement) instance is launched attending auto-scaling group needs.
In the context of need a predictable Public IP addresses, general behavior doesn't fit our needs. When instance is launched manually is easy to resolve: you can attach an IP address from Elastic IP pool through AWS EC2 console, for example. But this could be difficult in an auto-scaling context.
A way to resolve this situation could be using ipassign script. Let verify this with an example!
Imagine previous instance (i-cf27aa8d). To use ipassign script we need to:
- Verify AWS CLI and ec2-utils packages are installed. By default, Amazon Linux instances arrive with them pre-installed. For Ubuntu distributions, probably you'll need to install them manually using apt-get commands:
- Login to the instance as root username. If role instance is not assigned, you need to configure AWS CLI with an IAM user allowed to execute describe-addresses, associate-address and disassociate-address EC2 actions.
- Install ipassign script. Just follow next instructions:
- Download ipassign script and copy inside your instance in "/etc/init.d" directory
- Modify script permissions: chmod 755 /etc/init.d/ipassign
- Add script to instance startup process: chkconfig ipassign on
- Review ipassign configuration. At the beginning of the script, there are two parameters you need to review and ensure are correctly configured:
- REGION: Defines the AWS region. Value must be the same used by instance. By default is set to eu-west-1 (Ireland) region.
- IPLOGFILE: Defines log file. By default is set to "/var/log/ipassign.log" and my suggestion is maintain this value.
Done! If we restart the instance, during startup process will try to attach a free Public IP address from Elastic IP pool. Imagine we have three IP address associated to our account, all of them are currently in use:
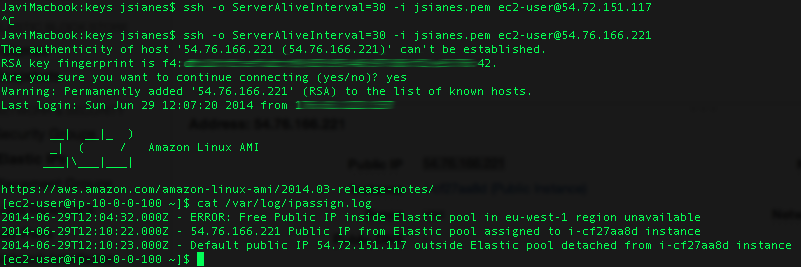
In this context, instance can't attach any Public IP. Script is designed to avoid changes if an IP from Elastic IP pool can't be attached. Next time we login to the instance, if we review log file will see an error message registered:
Just go to AWS EC2 web console and request a new Elastic IP:
Now (with a free Public IP in Elastic IP pool), if we restart instance again, we'll see ipassign script can find one free IP address in Elastic IP pool and attach it to the instance:
Login to the instance (now, using the new Public IP attached) and checking log file, next information is displayed:
Finally, in instance general information panel, we can review how the instance has a new Public IP address (54.76.166.221) from the Elastic IP pool correctly assigned:
By default, 5 Elastic IP addresses can be associated to an AWS account. But this limit could be increased, if needed.

